DIY Design and Fabrication (24-672)
DIY Design Final Project
Objective: Create a project which highlights techniques developed during the class
For this project, I decided to make a fountain based on Yosemite Valley. I used techniques learned in this class such as lasercutting and casting. I wanted to create a piece which was backlit, so I also opted to use a clear urethane as my casting material. You can find a product flyer here: Yosemite Water Fountain.

Design Process
First, I found an STL file for Yosemite Valley. You can find the link here. To emphasize the topography, I stretched the original x3 in the vertical direction. I would then print a miniature version (about 1 inch long) to envision the design.
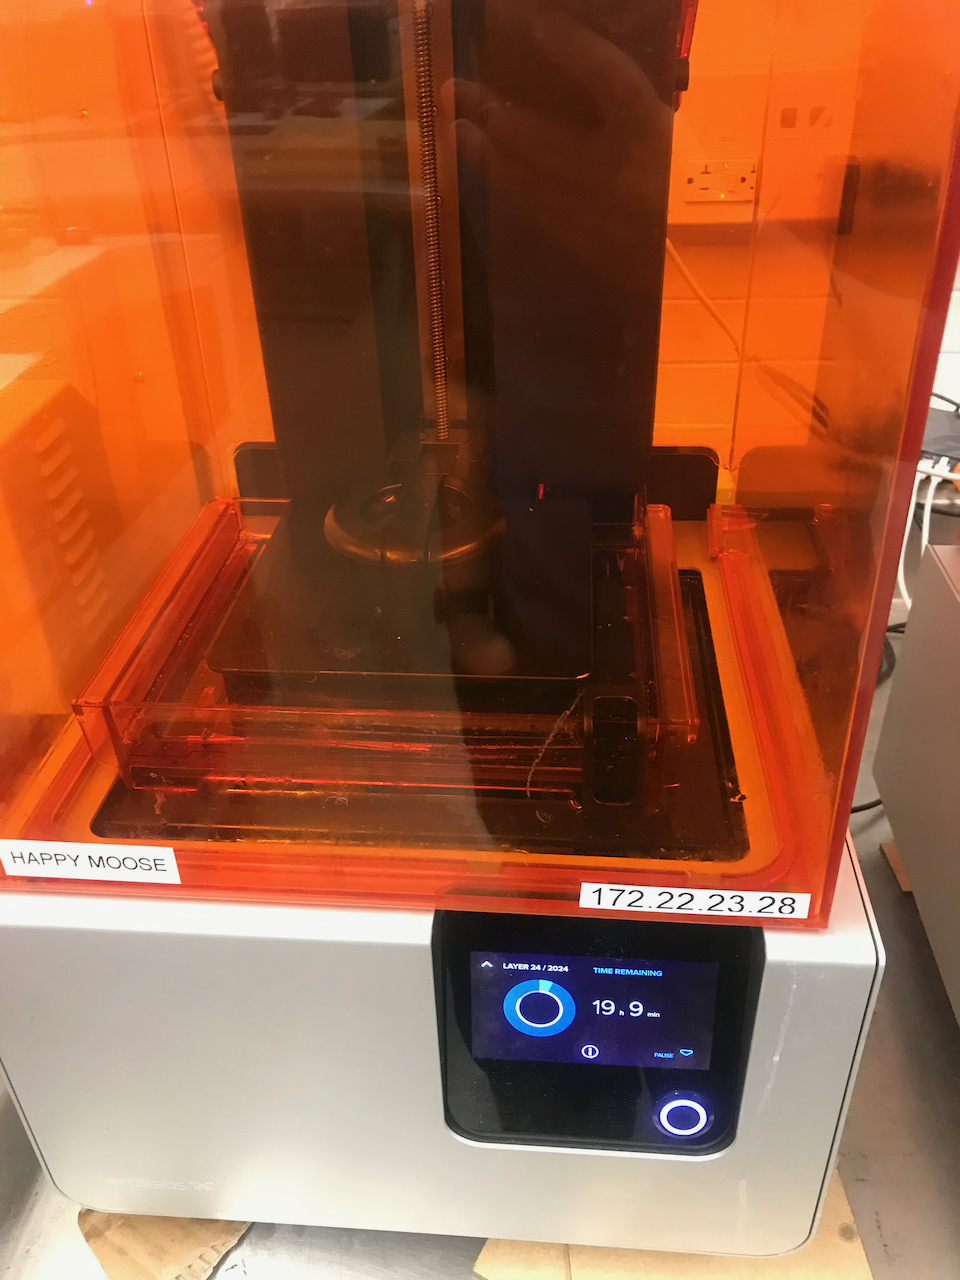
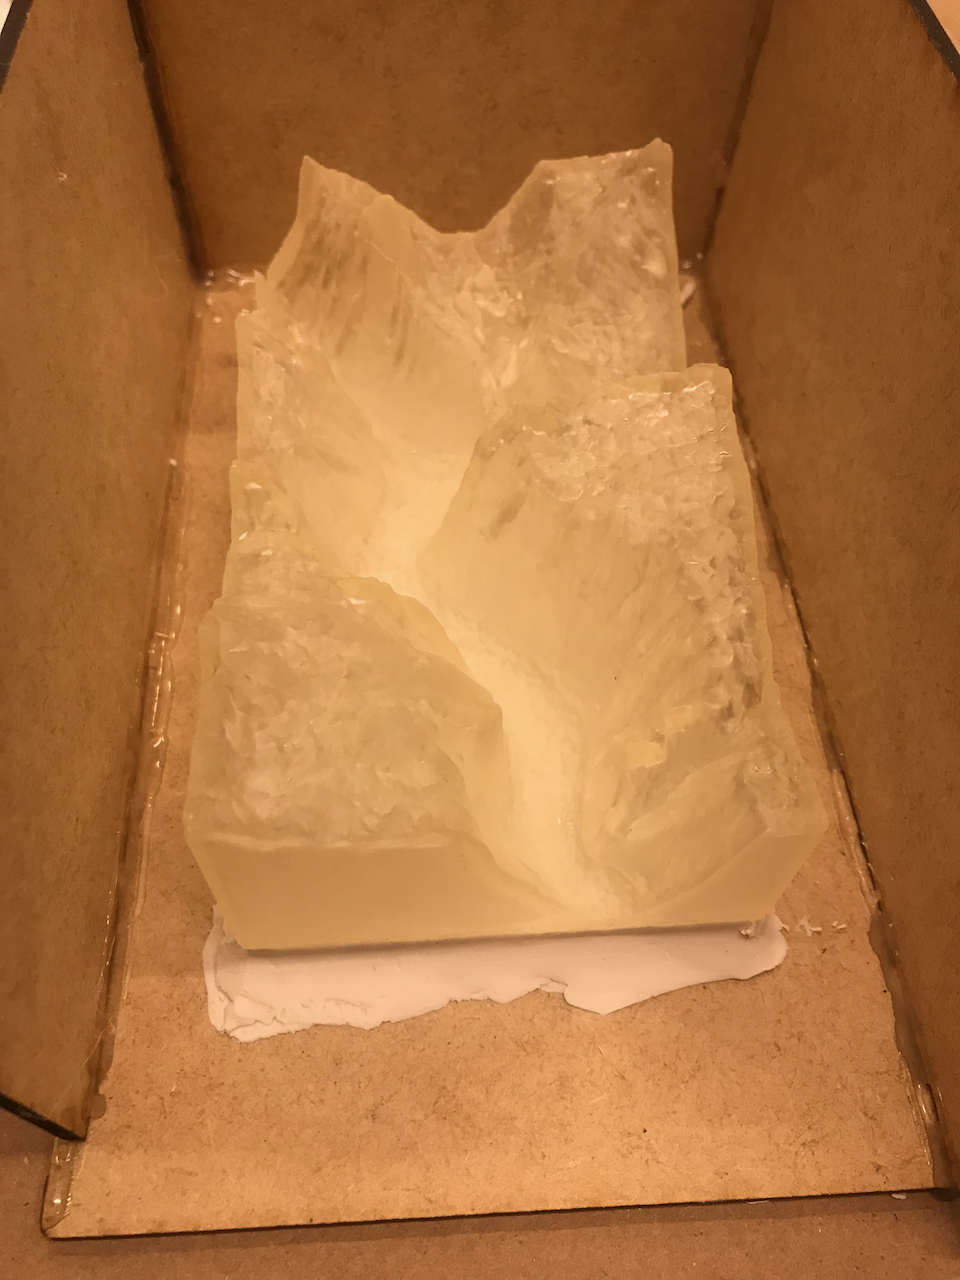
After I printed this out, I proceeded to make a full-scale print for my model. For best dimensional accuracy and resolution,I used the Formlabs Form1 SLA printers with 0.25mm layer thickness. This allowed a quite detailed design. However, solid piece was going to be very expensive to print (roughly 260 grams, at 50 cents a gram). In order to reduce this expense, I used Meshmaker to hollow out the part, and then printed the piece as a shell. After this piece came out, I then postcured it with UV to ensure the part was strong enough for the mold.
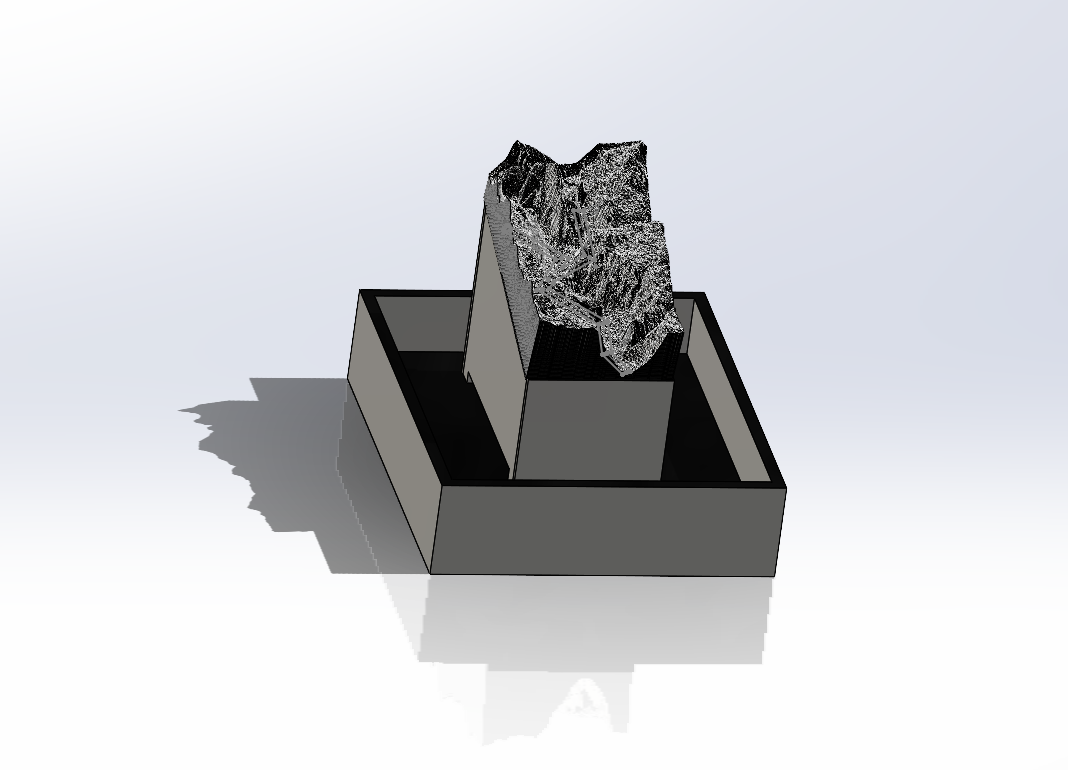
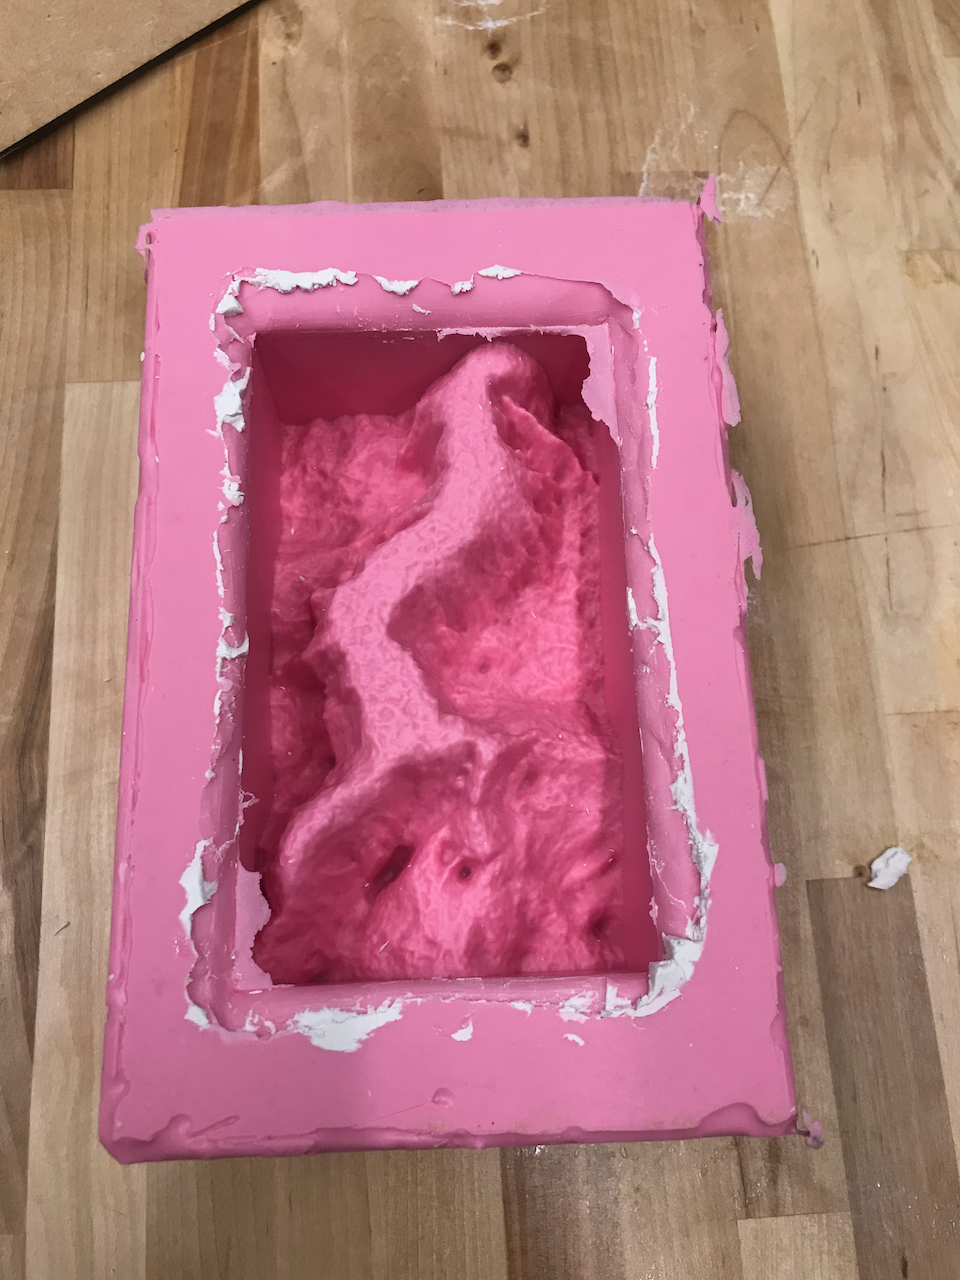
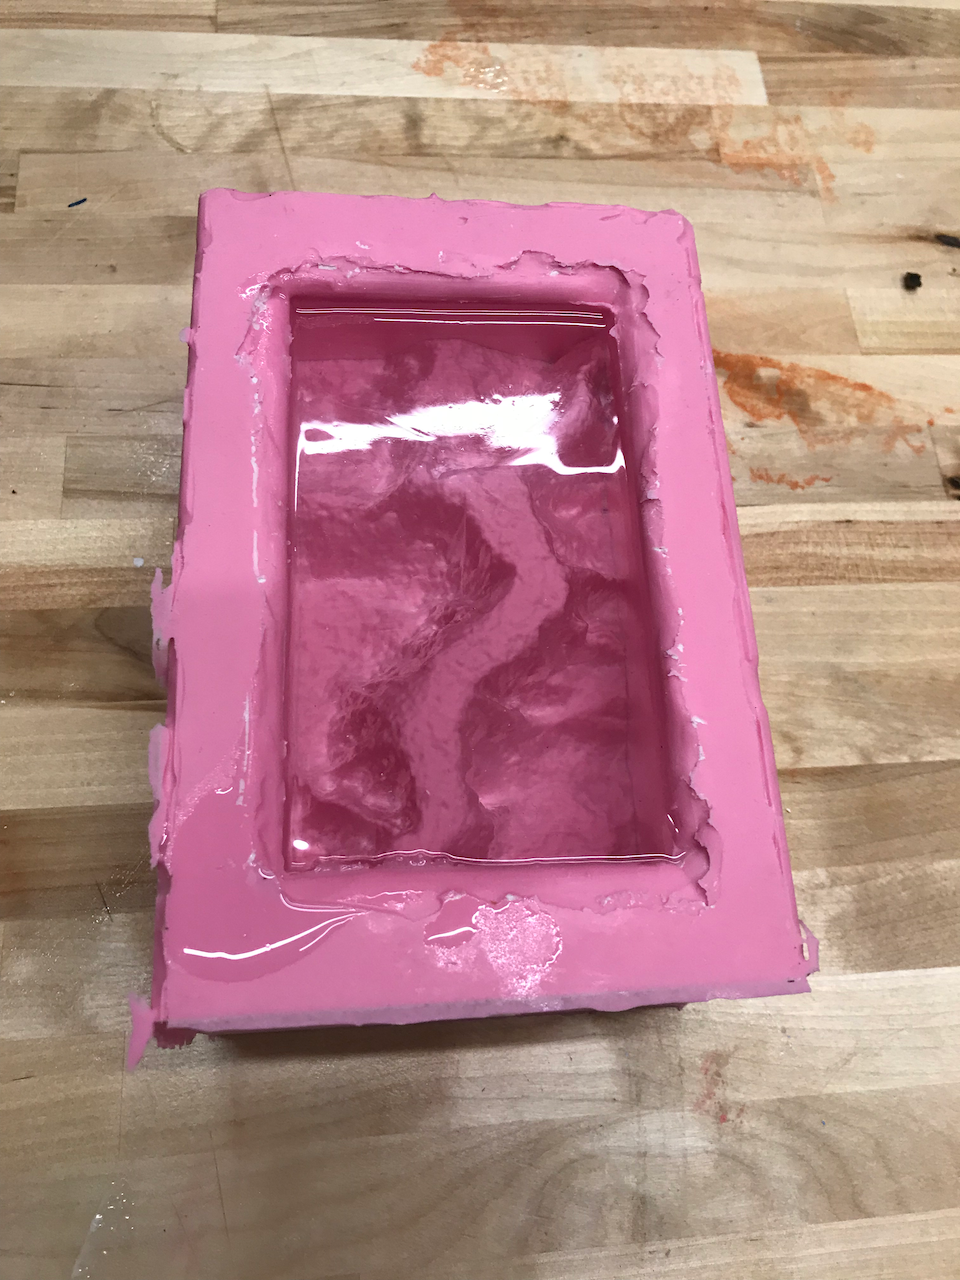
I decided on a one piece mold for simplicity, and so I simply used clay to attach the 3D printed part to the base of my mold box. I used lasercut MDF to serve as my mold walls, and Moldmax 30 as my mold material.
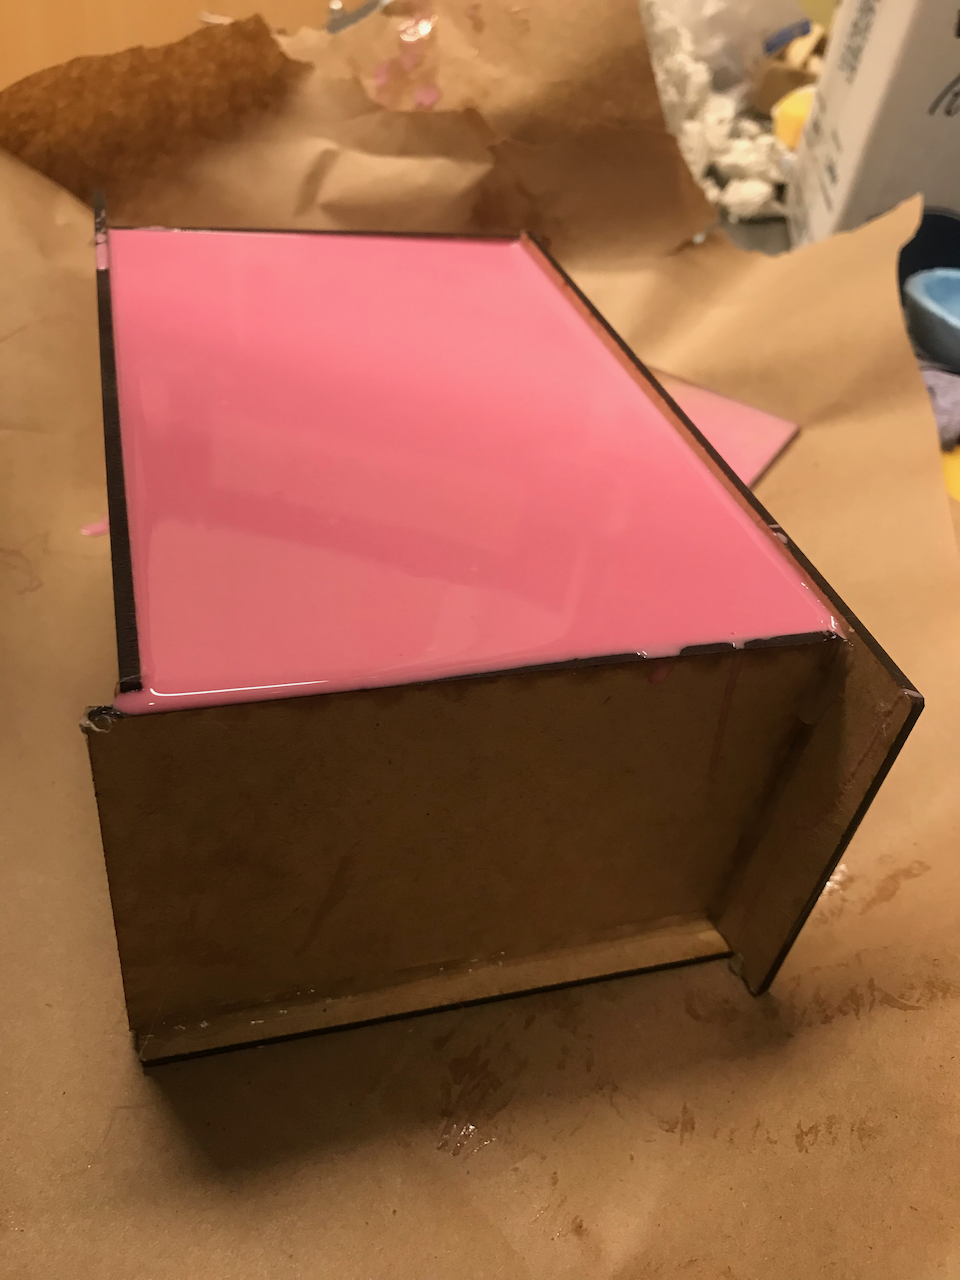
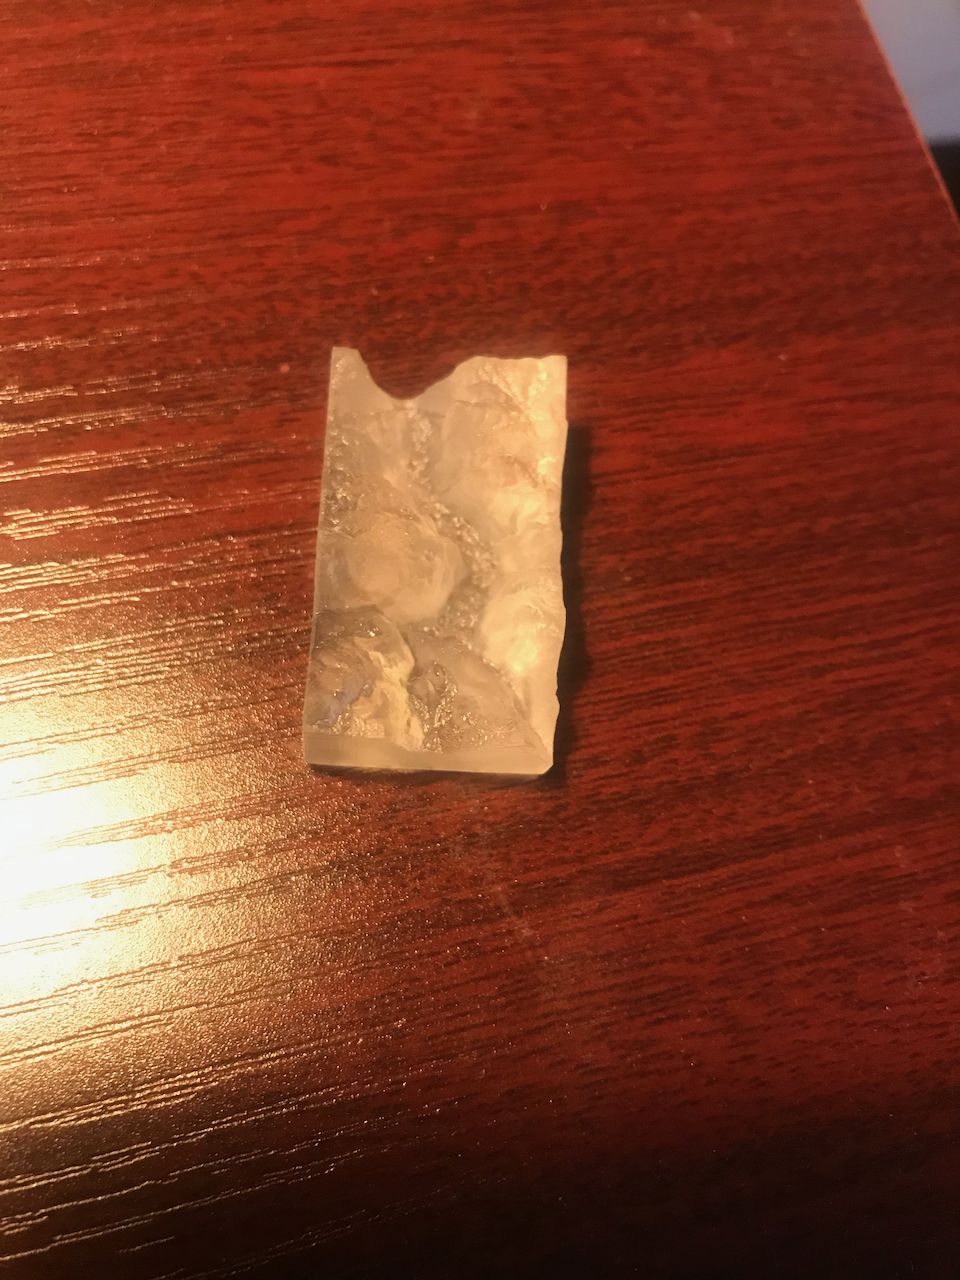
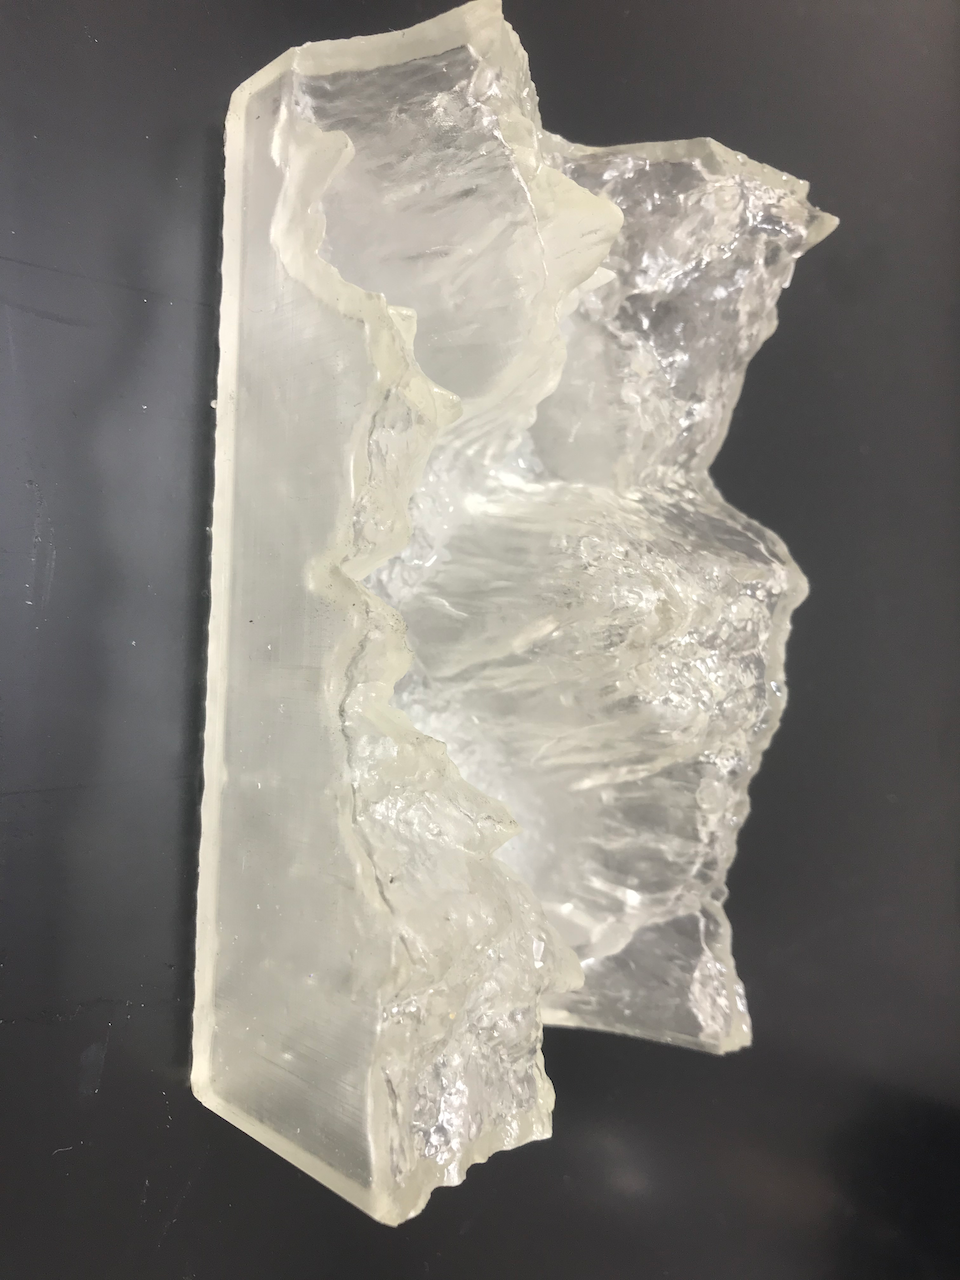
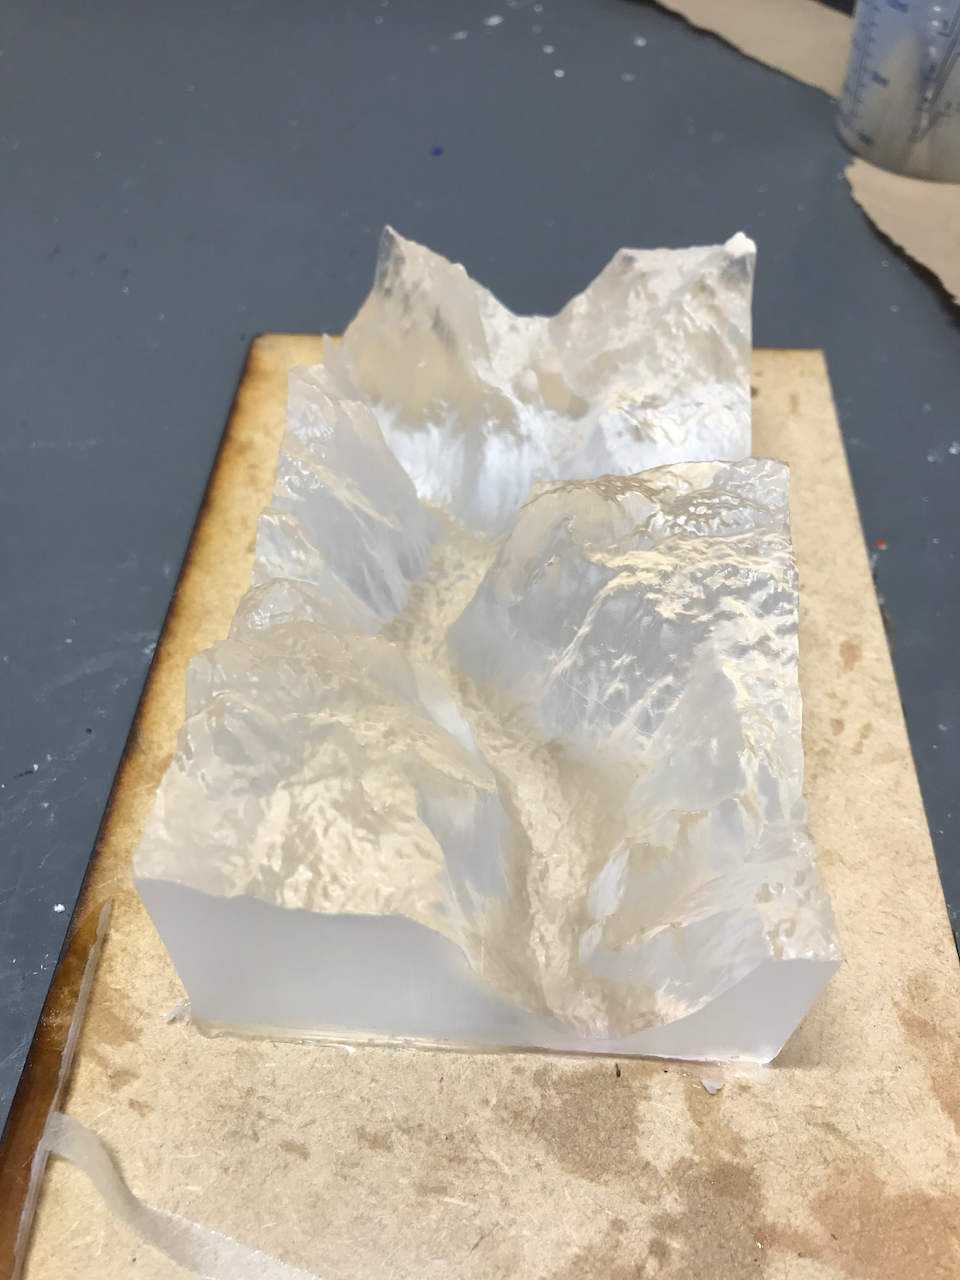
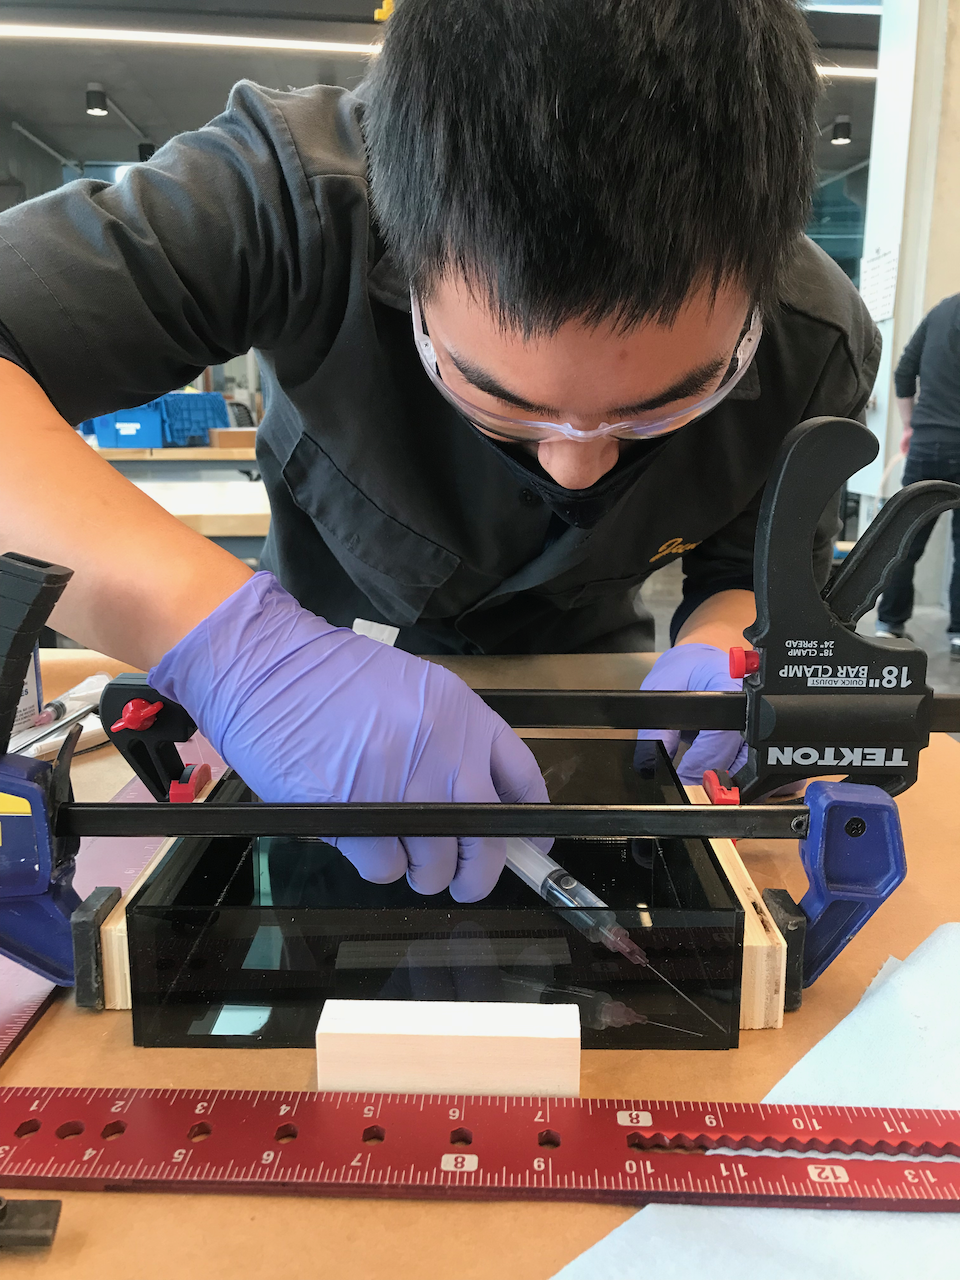
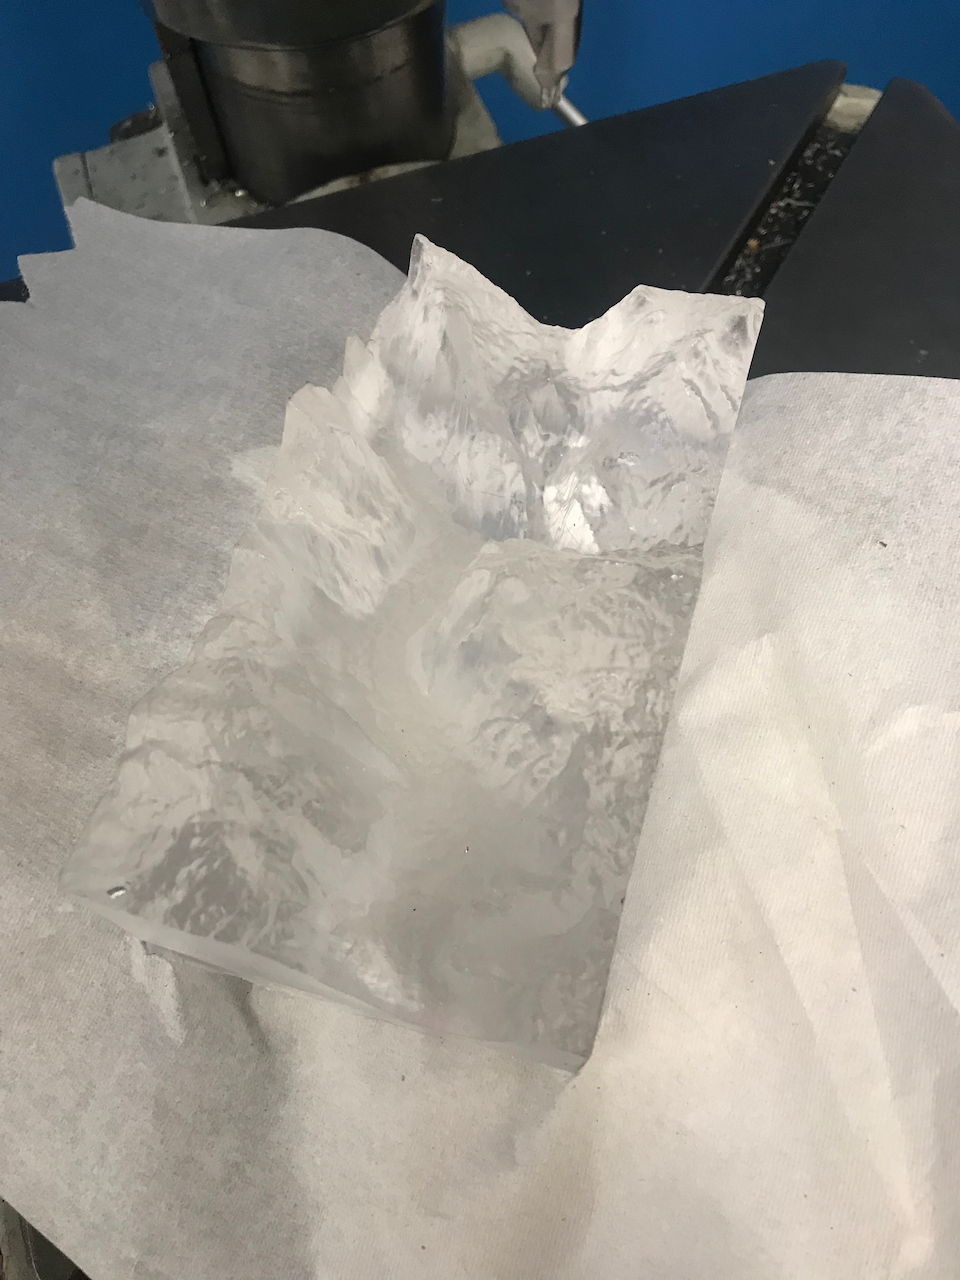
With my mold complete, I moved onto the resin casting. I was very impressed with the level of detail in the mold, and so was very excited about the results. To create a clear piece which would refract light, I used CrystalClear 200, a water-clear urethane resin. In order to use, I needed to follow special casting instructions, including preheating the mold, pressure casting, and postcuring
The final casted result. I was very excited about the quality of this piece.
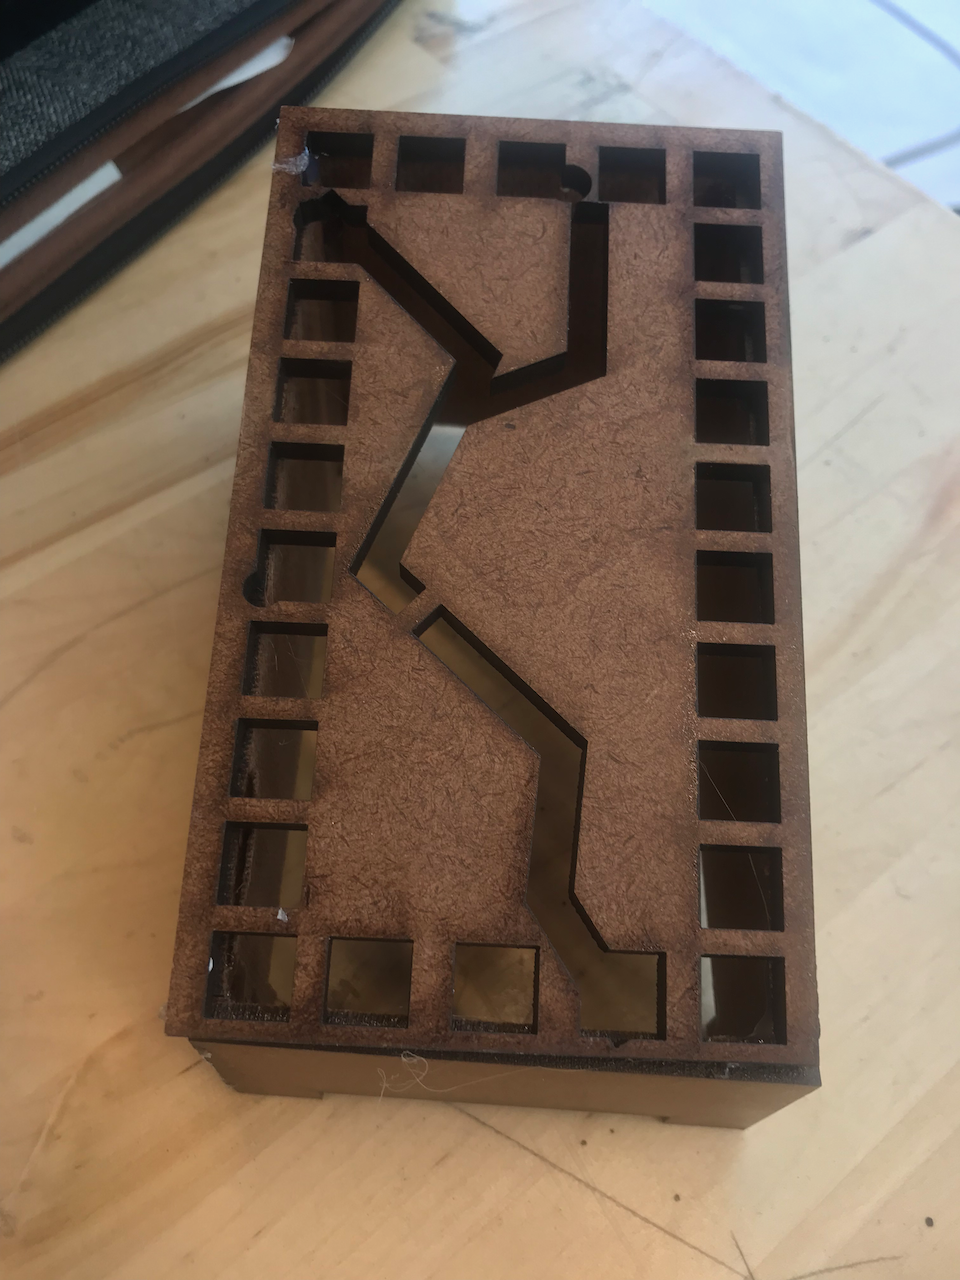
After I fnished casting, I moved on to fabrication of the base. Here you can see a wood mockup. I experimented with different pattern layouts as well as colors to ensure optimal light quality. In combination with the LEDs, I was able to see which combination of patterns and materials worked the best. In the final version, I chose between a version of mirrored acrylic and black acrylic, ultimately deciding on mirrored acrylic for better reflective properties.
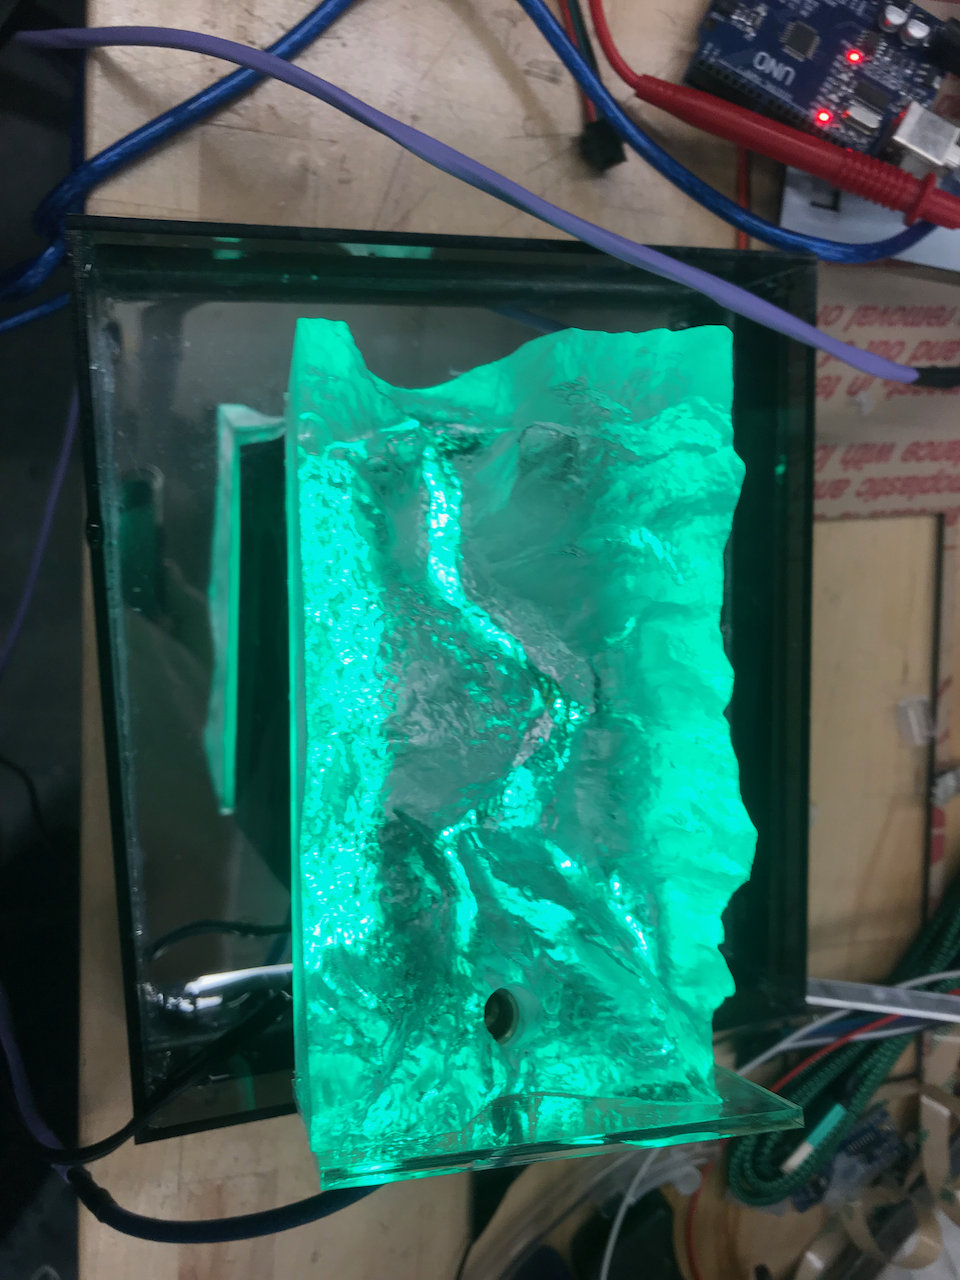
Following this, I moved on to final fabrication. I built the base out of acrylic, utilizing smoked acrylic and mirrored acrylic in the base and black acrylic for the pedestal. This mirrored acrylic allows the light to be reflected, while the smoked acrylic allows the user to see through the side into the water. The black acrylic contrasts with the lit portions to provide better visibility and allows the lit portions to be more prominent. To connect the water pump to the cast piece, I used an 1/4” NPT pipe fitting. Here, you can see me on the drill press to drill the hole for the water to travel through. The NPT pipe threads were then tapped into this hole and screwed into the base. I am using a small garden pump which can produce 95 Gallons per Hour.
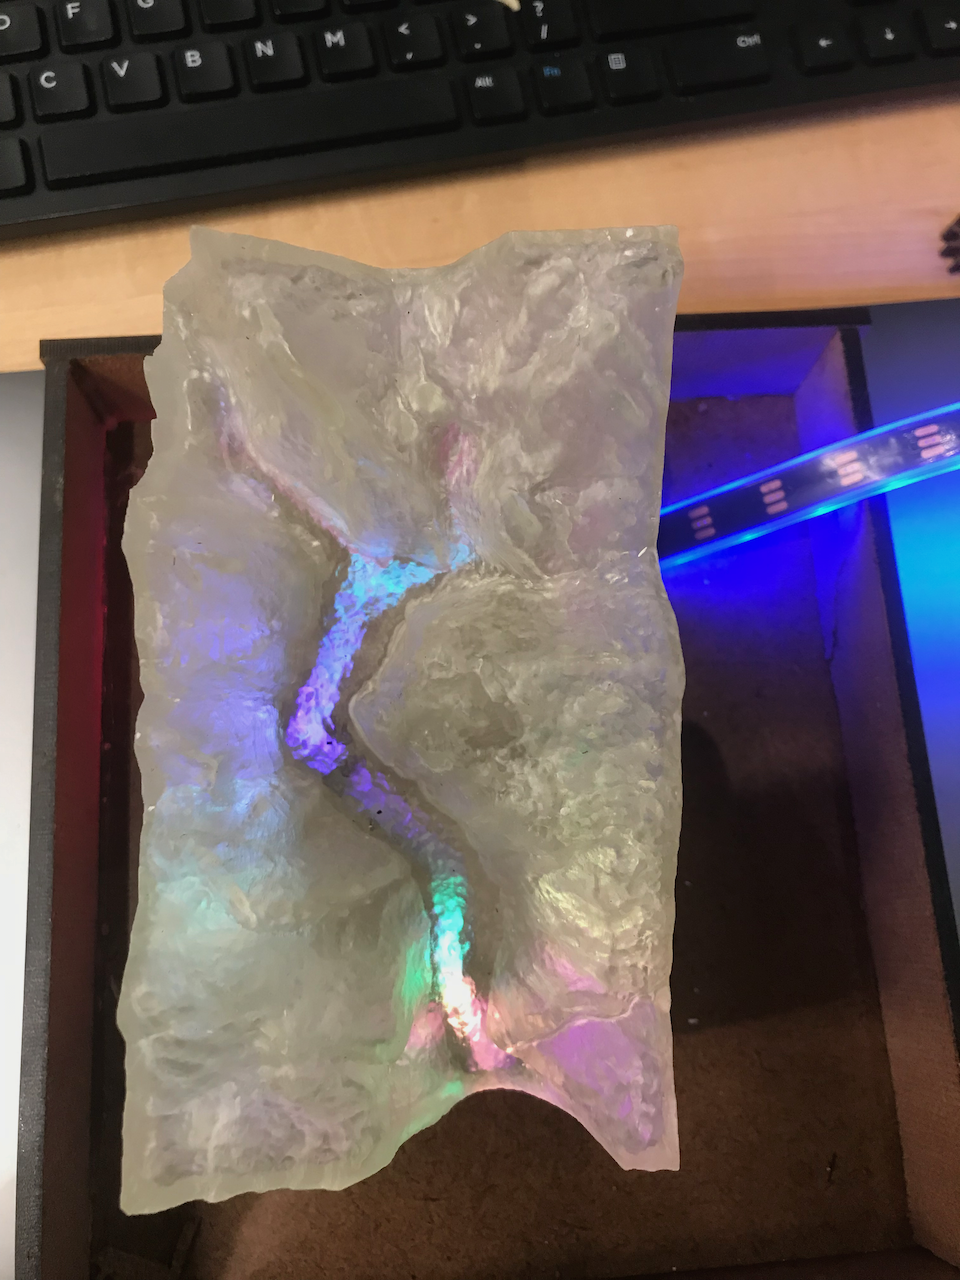
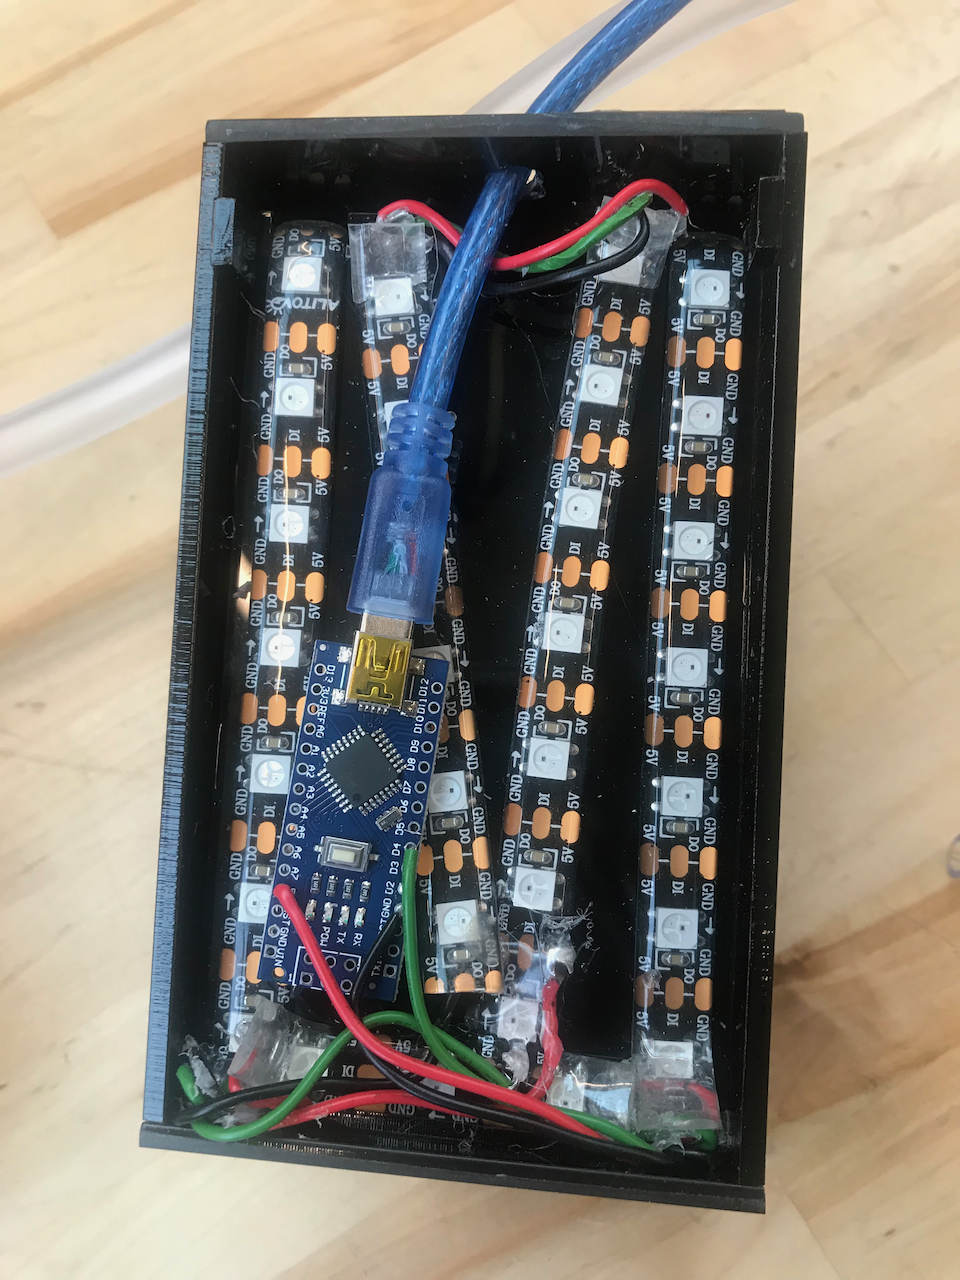
I next installed the LEDs and tested them with the water. On the left you can see the individual strips, which sit below the cast piece. Additional LEDs are used to reflect down into the water and backlight the fountain. The LEDs in the center are designed to follow the path of the water, while the LEDs on the perimeter edgelight the cast piece. The LEDs are powered off of an Arduino microcontroller, and I am using individually addressable LEDs so I can get color-changing patterns.
Here is my final design!